
Adding a Zoom Meeting to Brightspace
Creating the Meeting:
To add a zoom meeting to your Brightspace course, first navigate to the specific course you wish to create the meeting for. Once in that course click on the "Zoom" link as seen below:

Note: You need to click the "More" link first.
Once you click the zoom link it will open another page (Note: if you do not see the page below, please check your pop up blocker and third party cookies within your browser settings to make sure both are allowed for this site) You should see this page:
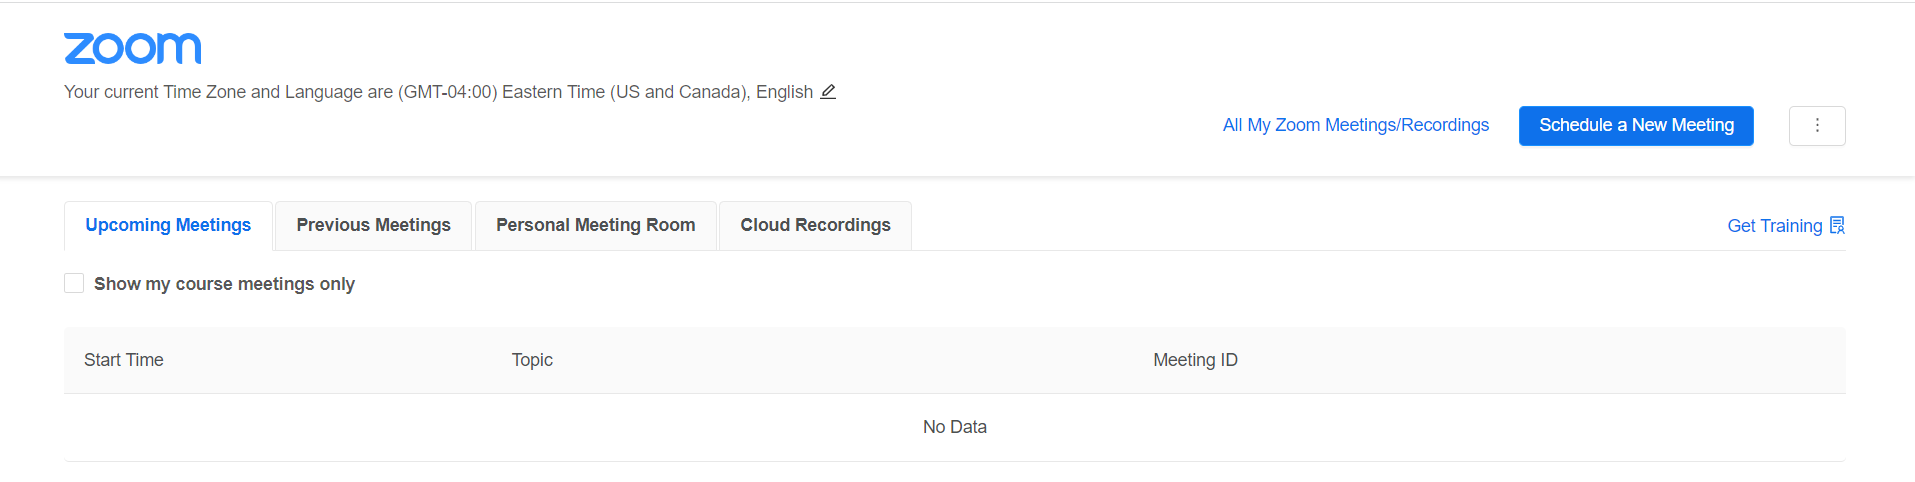
In the upper right hand corner you will notice the button that says "Schedule a New Meeting" clicking on that will bring up the next page allowing you to set up your meeting:
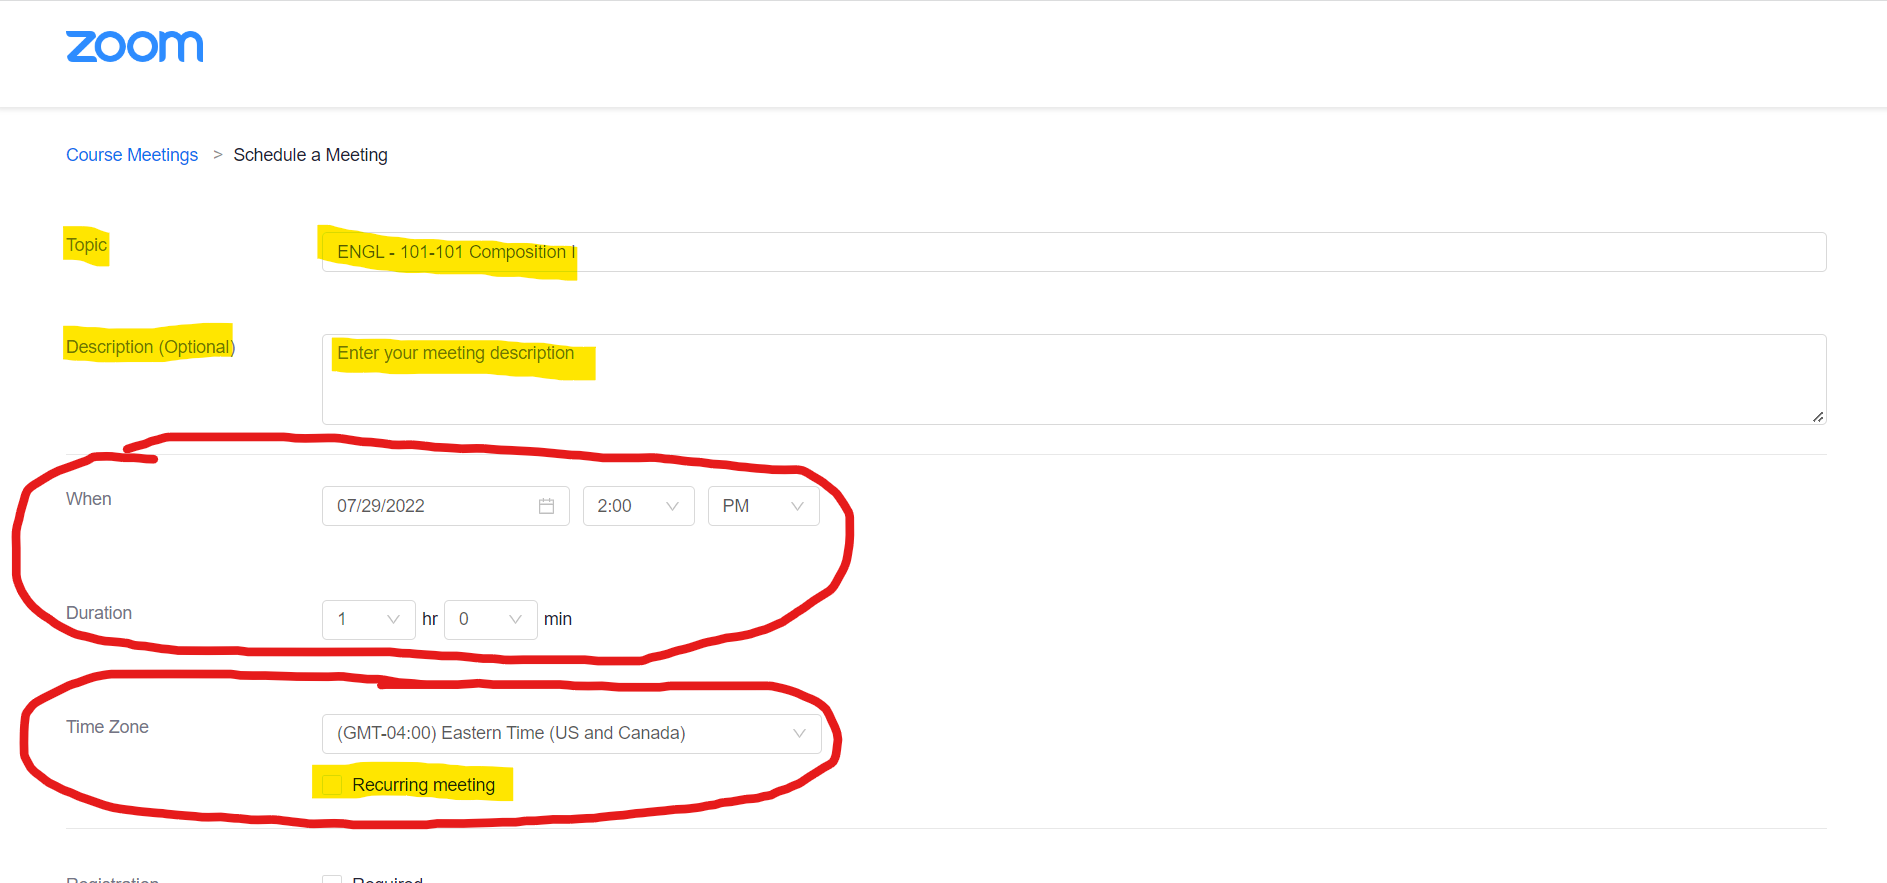
Note: The Yellow Highlighted Area showing the Title and description are optional to edit. The title is prepopulated with the name of your course, and unless you just want to name it something different, will be just fine. You may want to rename your Office hours to something other than the course name if you do schedule them here, just so it is not confusing.
The red color circled areas are required fields You must set the beginning date, time and duration. Also make sure your Time zone is correct, and if the meeting is recuring (meeting more than once) select that box for more options. You will most likely also want "enable join before host" selected so that your students can join before you do. You will also want to select the "record the meeting automatically in the cloud" option so that students not able to join the meeting will be able to view the recording later on.
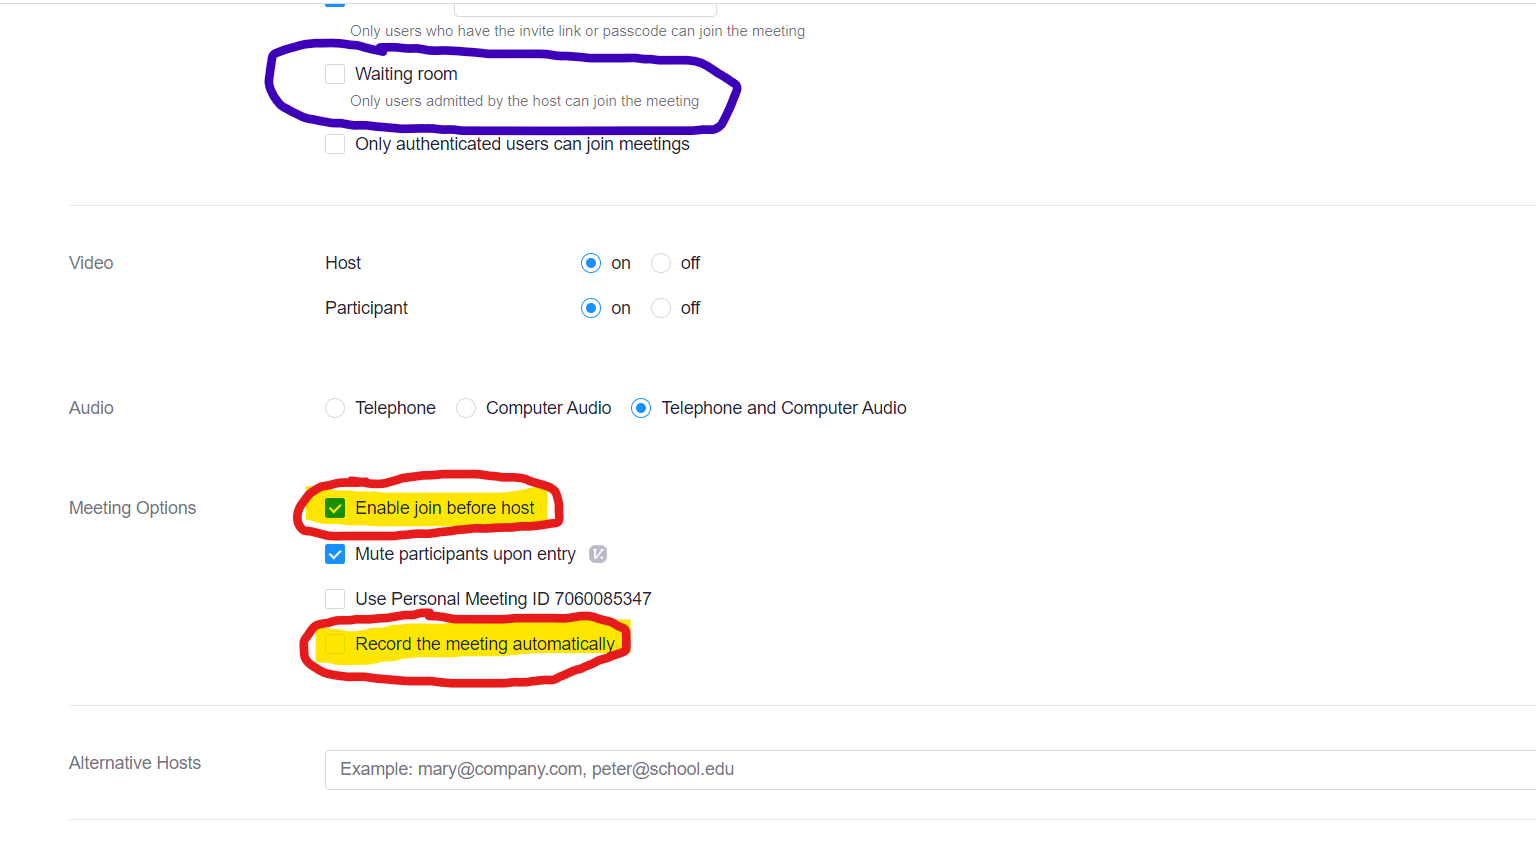
The blue Circled area is the waiting room, this places anyone other than you who joins into the waiting room until you allow them into the meeting. This is good for office hours when you may want one on one time with a student and do not want other students joining until you are ready for them. However for class time you may want it to be open for all to join without you having to allow each person individually.
Recurrence:
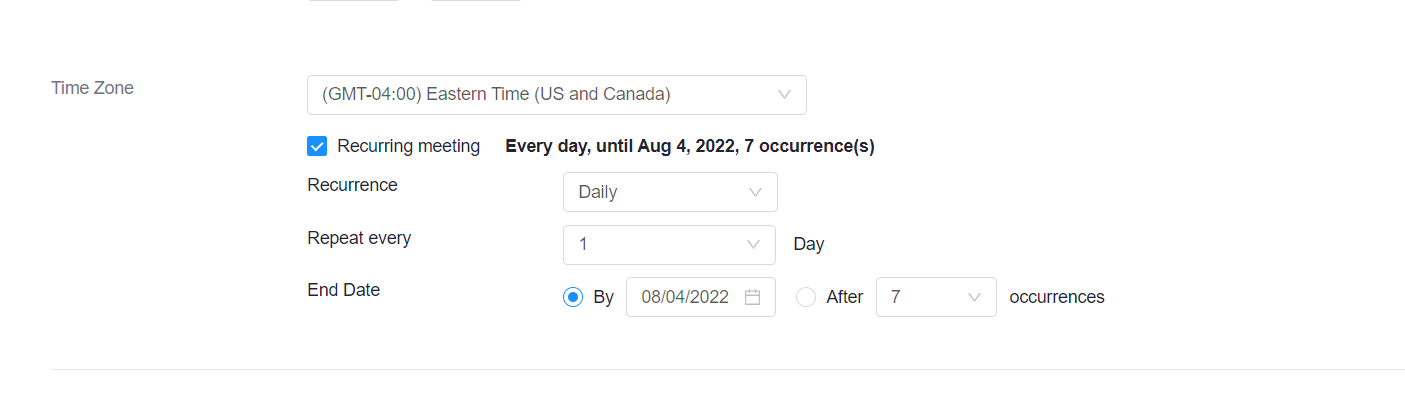
Default recurrence is Daily, I have selected Weekly as that is the most used recurrence for classes, selecting this will have the meeting occur every week on the specified days, you see Thursday selected here, but you can select multiple days, such as Tuesday and Thursday, etc.. You will also want to select an End Date. Simply click the calendar icon beside the prepopulated date and select when you want the meeting to stop recurring - usually the end of Finals week at the end of the semester.
Once you have set up your days/ times/ recurrence and options for your meeting, scroll all the way to the bottom and select "Save"
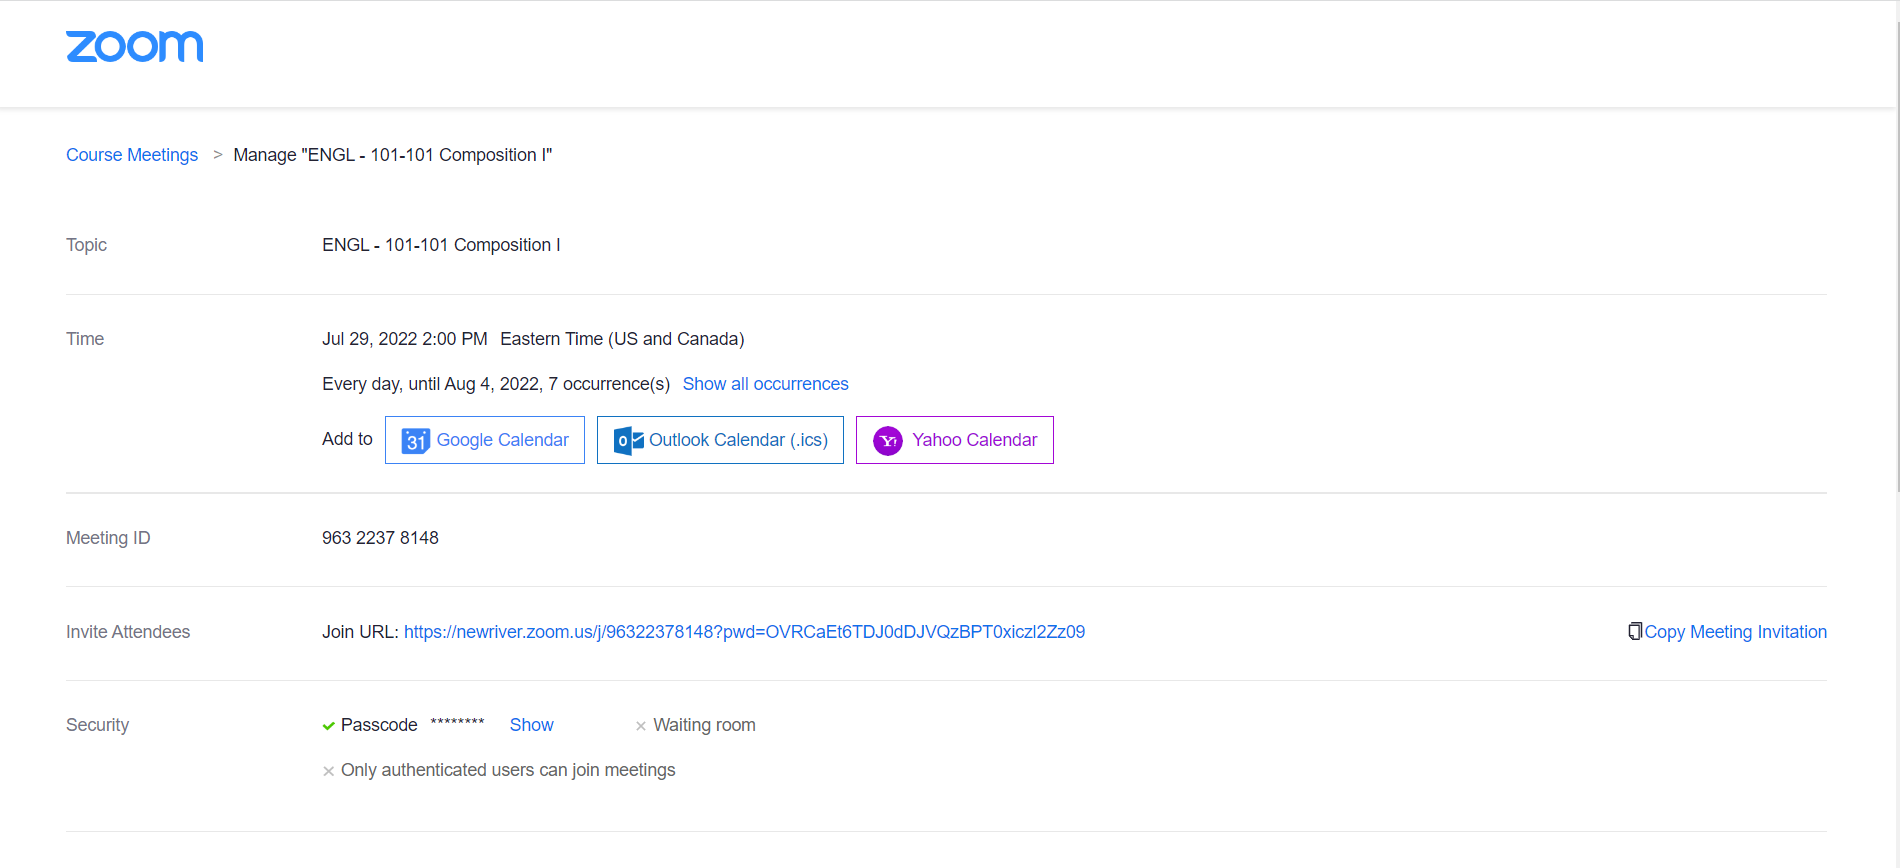
it will then take you to a page that has an overview of your meeting, along with a link that you can send to those you may want to join (you and your students can join from the zoom link in Brightspace, but you also may want to send the link out to your students so in the event Brightspace would happen to be down, you can still meet via that link)
Joining your meeting from Brightspace:
Select the Zoom link within your course, just like above the page you land on should look something like this now:

Your students will go in the same way, instead of seeing "Start" and "Delete" they will have a "Join" option on the most current meeting link only.
If you need to edit your meeting, click on the blue title of the meeting within in the "topic" column and you will be taken to the same overview page you saw after you set it up, all the way at the bottom of that page you will see an "Edit" option which will let you go in and edit any options that you need. It will also ask you if you need to edit only that meeting or if you need to edit all occurrences (will make the change across all occurrences of this meeting), select the option that applies.
Recordings:
To view any recordings for your meetings, navigate to the specific course you wish to view the recording for and click the Zoom link as above: On the zoom landing page select "Cloud Recordings" You will be able to see all of your recordings for all of your meetings here, however students will only see the recordings for this particular course.